Archive for January 2010

EOTD: more greens

So I wanted to try out my new eyeliners, and was in a spring mood. Waking through melting snow, really makes me look forward to spring. Anyway, this EOTD is from a few days ago, and I thought I'd share.

Products I used:

  • Hema eyeshadowbase
  • 88 palette Matte
  • Gosh, Extreme art eyeliner, no. 05
  • Gosh, Extreme art eyeliner, no. 12
  • L'oreal Lash Architect, Midnight Black


I used the Hema eyeshadowbase, because with the matte eyeshadow I want a matte base. I used some random greens from the 88 palette, on my eyelids, and a darker one in the crease.
To give some extra colour I used a very light limegreen on the inner corner of my eye.


I used the light extreme art eyeliner (no. 05) above my eyelashes, which gives a great contrast.  I also made a little wing with it, to keep the contrast with the darker colours.
Below the eye I used the other eyeliner (no. 12), so it gave a nice contrast with the other eyeliner. I extended the line to the other wing, so I got a two-coloured wing.

After applying some mascara, this is the look I got:


Most of you will know by now that green is one of my favourite colours. What is yours? And do you think this is to much for a daily look? I know some people don't like bright or really dark colours for a daily look, but  I think it can be really nice.

NOTD, W.I.C by Herome, Toronto

I spotted these gorgeous nailpolishes at the DA some time ago, and ever since I wanted some. So this week I bought myself 2, and one of them was this amazing colour that I fell immediately in love with.

It's called no. 118 Toronto, W.I.C. by Herome.


It's an amazing green colour with silver shimmer and sort of a gold wash in it. It's best described as a shimmery IceGreen. (Like Iceblue, but with green instead of blue).
On the pictures it looks more blueish, when in reality it really is green, I've tried different lighting, but unfortunately that didn't change anything on the pics.


And here's a closeup shot (still not the right colour though, it's more silvergreen):


Makeup Haul

I haven't posted any new products I bought lately, so I thought I'd put them all into one post.
I'll make a blog about them later with NOTD's or swatches and that kind of stuff.

Some time ago, Essence came with the limited edition Moonlight collection. It was sold out pretty fast, so I didn't really see it in stores. One of the items people really got crazy about was the brush they sold. I read a lot of reviews about it, and it looked like a nice brush. Now, I found one recently online, and it was pretty cheap, so I couldn't pass that opportunity.


I also bought some nailpolish of some brands I've never used before (see? I listen to the outcome of my polls!). A nice effectpowder by Etos, which I'll probably use for an EOTD soon. And I also found some green glitter and a brush that went with it for only 1 euros each. No idea what I will do with it yet, but I bet I can think of something. ;)


I love eyeliner, and when I found this bargain online, I could NOT pass on it. These eyeliners by Gosh are 8,95 euros each. And someone sold 8 of them for only 12,50 euros incl shipping!
I wanted to buy some of these anyway, and the other colours are just a nice bonus, they will probably be used for freaky looks :)


So, I hope you're interested in  thes products, because I'll probably be blogging about them soon. :p

Review: Trind Nailrepair and Magic Buffer

Some time ago I won the Trind Nailrepair and the Magic Nailbuffer at beautytreat, you can read about it here .
After using both for 3 weeks, I think it's time for a review.

The Trind Nailrepair:

Firs of all, I really like the bottle. The top has a nice shape which makes using it very easy. It lays comfortably in your hands. The fluid itself is easy to apply, the brush is small so you can be precise if you want.
The nailrepair dries really fast, which I like, because I usually apply some nailpolish after it aswell. It seems the nailpolish dries faster on the nailrepair aswell, but that could be just me, most of my polishes dry fast anyway.
I haven't used any other Trind products, or any other brands except the nailpolish. This way my cuticles weren't 'protected' (as adviced) but although they did tend to harden a bit on the sides, I didn't really have a problem with them.

Did I see a difference with my Herome nailhardener? Not really. Because you can't SEE a difference I didn't post before and after pics.
I do FEEL a difference though. Where Herome makes my nails strong and hard, Trind tends to make them strong, but still flexible. Some people might like that, but it's the whole reason I started using nailhardeners in the first place. My nails are pretty thin, weak and bendable if I don't use anything on them. They tend to rip on the sides, which giave me short nails most of the time. With Herome, they are strong and don't bend, which doesn't make them rip, which gives me beautifull long nails.
Trind makes my nails stronger, but they are still a bit bendable, which makes them vulnerable on the sidepart where they meet my skin. Just where the nail leaves the skin to grow on its own. Especially when I bump my nails into something it can cause them to tear or break. Also, when wearing nailpolish, it can chip the polish off. Especially since I tend to bump my nails into stuff all day, especially at work, this isn't really something I like.

So I have to say, I'm NOT convinced by Trind. I'm still loving my Herome more.
That being said, I have to say that this is just My opinion, and the experience with MY nails.
If you like your nails a bit bendy or maybe your nails are a bit thicker/stronger than mine, you might really like Trind.
Don't get me wrong, it is a great product, and I will probably use it untill the bottle is empty. But I'd like to stick to my Herome nailhardener.

Magic Nail Buffer


This one brought up some memories. When I lived at my parents house, we used to have something like this, but then it wasn't a 3 in one buffer, but 3 seperate buffers and a very nice file. I can't remember what brand it was, they were all in a red velvet package together. It might even have been Trind, I really don't remember.
Having used those buffers back in the day, I knew what this one could do, and I was really glad I had one of my own now. I have to say, I had totally forgotten all about these buffers and what they could do for your nails.
I used this one, once a week, as recommended. It files away all the little strips on your nails and buffers them up really nice. It made my nails nice and smooth, which makes applying nailpolish easier, and they will stay on better. Also, if you don't use a basecoat it will really give a smooth result.
The buffers really made my nails shine again, which they normally only do when I have something on them.
I'm definately going to keep using this one and I can recommend it to anyone. Even if you don't wear any nailpolish, this can give you smoother, shiny natural nails.


Homemade Exotic Night Perfume

Exotic Night Perfume

I just found another interesting perfume recipe and the ingredients needed are really not that hard to find. This is about how to make your own homemade Exotic Nights Perfume.


Maybe you might be wondering "Why it is called Exotic Night Perfume?". Well, this homemade perfume is quite exotic in the sense that it has a much heavier and musky scent. There are scents that are entirely appropriate for the day, and one that works better for night. It is recommended to use a heavier, or muskier scent for the evening.

So without further ado, here's what you need to have and what you have to do.

Exotic Night Perfume

4 drops sandalwood
4 drops musk
3 drops frankincense
2 tsp. jojoba oil

Mix thoroughly

It's as simple as that.

I hope you enjoy this share of homemade perfume.
Until next time ^^


Metallic Stones palette, Swatches

Some of you have been asking me if I could make swatches of the Metallic Stones palette by Zoeva.
Since I usually have a hard time getting the colours right on the picture when I make swatches, I thought it might be easier to search for another way to show you.

The lovely Snoezepoes, who is also a member of the dutch Lush forum, made some great swatches a months weeks ago, so I decided to ask if I could borrow hers.
She didn't mind at all, and I really recommend that you all check out her blog aswell, this girl knows how to use her eyeshadows!  Her latest blog even shows you how you can make your own eyeshadowpalette, go read all about it here.

All pictures below are made by Snoezepoes (except the first one, it's from the Zoeva site) and are borrowed with her permission.


Here's a picture of the palette itself.


All swatches are made row after row, from the left to the right, 4 rows beneath eachother.
First row:


Second row:


Third row:


Fourth row:


As you can see, the eyeshadow is really pigmented. After I saw these swatches, I was totally in love with the palette, and a few weeks later, I owned one. Yeay!


Walk like an Egyptian..

Somewhere last week I was a little bored, so I decided to do something different with my makeup.
For some weird reason I had the song ''walk like an Egyptian'' in my head, so this lookis inspired by that song.

Products I used:

  • Metallic Stones palette (Zoeva)
  • Gosh eyeshadowbase
  • Gosh velvet touch eyeliner, Rising Sun
  • Essence longlasting eyepencil, no.1, Black Fever
  • Maybelline, The Colossal mascara
  • Gosh effectpowder, Blue Diamond

I started out with the Gosh eyeshadowbase, but afterwards I think the Hema base would have been better for this look. The effectpowder and eyeshadow weren't easy to blend with this base. Oh well, it was just for fun.
I applied several golden colours of the Metallic Stones palette. (second row from the left) I also used the darker one on the top, 4th from the right. BUt because it didn't blend togetehr well, you can't really see this one on the pic.


Below the eyebrows I used the Blue Diamaond effectpowder, because to me Egyptians used a lot of gold, black and blue. The blue was partly inspired because of the makeup Elizabeth Taylor had on in ine of her roles.


After that I used the Essence pencil as a eyeliner above and below. Also a bit on my waterline, to really get that black look. On the side I made two wings, with a littl curve and a little extra stripe, to give it that egyptian look.
Below the eyeliner and between the wings I used the velvet touch eyelienr to give it some extra golden touches. After that I applied some mascara, and here's the result:


Maybe I'll try one again sometimes with some darker coppery colours, It's always fun to try out new things.
Do you ever wear different makeup, or inspired by movies or pictures you've seen?

Incoco Self-Stick Nailpolish strips Review

A few weeks ago, I found this in a bargain box at Kruidvat. There were priced with a 2 euros sticker and it seemed a nice price to try these out. At the registry though, they scanned for only 25 cents! So that really was a great price to try them out.
I'm talking about the Incoco Self-Stick Nailpolish strips.

This is what's in the package:


The booklet that comes with it gives instructions on how to use them. I'll post these with a pictire of the backside of the packaging, which has pictures of how to use them. Maybe that'll explain it a little better.


You start out with selecting the right size for your nails. Each strip has a different size on each end. On end seems a bit more round and the other end seems a bit more square. When you've selected the right one, you tear it away from the rest of the strips. After that you remove the clear protection film.
The next step is holding the coloured stip on the silver tab, while you peel off the backside.
Then you carefully break away that silver tab, so all you have left is the nalpolish strip.
Now you try to place it as best as you can to your cuticle. Now you firmly smooth it out, so you don't get any wrinkles in it.
To remove the excess strip, you have to bend it downwards from the nail, and remove it with the file, making downward strokes.

After I did that, it looked like this:


I have to say, the nailstrips didn't really have the right sizes for me, most were too thin or too wide. And putting them in place is harder than it seems. They stick to you nail immediately, so there's no room for errors. When I bend them down at the ed of my nails, most of them already ripped off, so I didn't need the file. And the file itself wasn't really handy either, because it tends to file off parts of the strips that should stay on your nails aswell.
As you can see on the picture below, on some parts the strips didn't stay on perfectly after applying. For example look at the small chip on the pinky, or the small white edge on the tumb.


It does have a great colour and it says to have a basecoat, nailpoish coat and top coat all in one. I still used Trind underneath because I'm still going for three weeks of use before I write a blog about it.
Anyway, it looks good, if the application went well. and they stay on prety good aswell. I've had them on for 2 days now and they haven't chipped or torn in any way.
But the application isn't as easy as it seems, and to me, applying normal nailpolish is just as easy, maybe even easier. Because with nailpolish you can erase mistakes.
Also, they say they stretch vertically and horizontally, and I didn't really think they did. Especially not horizontally, because they didn't all fit my nails. And when I tried to stretch them a little, they would tear. Had to redo one over that, and there aren't a lot of extras to use.

This is btw the mess that was left after use:


Also something I do not have when I use normal nailpolish.

The package had one extra thing, I think it's 2 manicure strips, so you can try those out aswell. I'm not sure though, because nothing in the packaging says anything about it. The booklet has one side with a manual for the coloured strips, and the other side holds the manual for french manicure strips, so I think my guess is good.


So....would I buy this again? Probably not. They usually are more expensive, and to me they don't really give a better result than normal nailpolish. But if you can find them for a lower price, they might be fun for you to try out. And maybe they are easier to apply after you've already used them once.

Redken Blonde Glam Crystal Flash Review

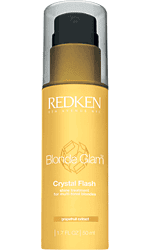
Hey everyone! Gosh can you believe January is almost over?! It seems like New Years was like, yesterday! LOL! Oh well, with another day comes another review! Today I'm reviewing Crystal Flash, a shine treatment for multi-tonal blondes from Redken's Blonde Glam collection. It's a neat little finishing product I picked up on a whim a few months ago (as seen in this HAUL!), but it kinda got lost in my sea of products so I never got a chance to review it until now!

Here's what the label says: "Leave-in shine treatment creates a lasting barrier against frizz while infusing multi-tonal blonde highlights with iridescent, multi-dimensional shine." Leave-in treatment is an interesting choice of words, considering that it's not a mask or deep conditioner - but it does make your hair shiiiiine. The directions tell you to use it in dry hair, but almost anything you can put in dry hair you can put in wet hair - but never the other way around!

Let's take a look at the main ingredients: Water, Dimethicone, Cyclopentasiloxane, Calcium Sodium Borosilicate, Triethanolamine, Acrylates/Beheneth -25 Methacrylate Copolymer, Carbomer, (fragrance, extracts, preservatives, etc).

So, this product is pretty strong with dimethicone being the second ingredient. Dimethicone is one of the heavier silicones, and even though cyclopentasiloxane is in here to break it up, it's still a bit heavy. Calcium sodium borosilicate is kinda like - liquid glass - hence the name Crystal Flash. They're basically these teeny little shine particles that help reflect the light and make your hair really sparkle. It's commonly found in products like sparkly makeup and glitter hairspray, fun stuff like that. It's actually hard to see it in the actual product (tried taking pics = fail), because it's so subtle - but you can see it on your hands after you put the product in your hair, it's kinda cool! Triethanolamine is used to adjust the pH along with carbomer (which also increases the viscosity). Acrylates/Beheneth -25 Methacrylate Copolymer gives a slight hold to keep the frizzies away, but barely noticable.

Do I like it? Yes. Am I in love with it? Not really. I like it because it does smooth hair, and it does bring out blonde highlights really well, but it's easy to use too much and ends up weighing down your hair. And even though the directions say to use it in dry hair, I think it works better when you use it in wet hair. I definitely will finish it all, but I don't think I'll be getting it again. Honestly, if I want a product for blondes, I think Bed Head's Dumb Blonde Smoothing Stuff is way better. But, if Redken ever reformulates this, I'll definitely give it another shot - because I so wanted to love this! Hmm, oh well.

Redken Blonde Glam Crystal Flash comes in a 50 ml / 1.7 fl oz. bottle and retails for around $15.

Another review done! Have a good weekend pretties, and take care of your hair! XOXO

Petrol & Purple

For me, petrol and purple are a match made in heaven. I bought some shoes who had this combination, and I've adored it ever since. I realized I hadn't made a blog about these colours yet, so here it is.

Products I used:

  • Gosh eyeshadowbase
  • Catrice, Soft Eyeshadow Mono, no. 280, Dark Lavender
  • Catrice, Soft Eyeshadow Mono, no. 260, Mystic Petrol
  • Bourjois, Regard Effet, Metallise, no. 87, Vert Eclatant
  • Bourjois, Regard Effet, Metallise, no. 78, Blue Chatoyant
  • L'oreal Lash Acrhitect mascara, Midnight Black


The eyeshadows are a bit darker than they appear on the picture, they look lighter because of the flash my came made. The left one is a bit more darker and a bit more green and the right one is also a bit darker and just a lill less blueish.On the rest of the pic you can see the real colour of the petrol one better, but the purple one still seems a bit more blue than it really is.


 I used the Gosh eyeshadowbase for this one, because Catrice eyeshadows tend to fade a little and this base is a bit more sticky, which makes the eyeshadow stay on better.


 I used the Petrol colour on most of my eyelid, and a little in the crease near my inner eyecorner. Than I applied the purple one on the oueter eyecorner and blended it at bit with the petrol. After that I applied the purple in the crease and a little above, to give it that extra touchwhen my eyes are open.


I applied the eyeliner below my eyes in the same order as above. Just a bit of purple on the outside and with the smudge brush I blended them together.

I applied some mascara on my lashes, and also a bit on the lashes below my eyes.


And for Sarah who wants to see how I match clothes and makeup, here's a full face pic. I'm not wearing any other makeup on it, and it was freezing outside, hence the red nose.And I just got back from the dentist....had to replace an old filling....and I'm still able to smile, I'm so though, hahha.


What do you think of these colours together? Do you ever use colours together that most people don't think about to match?

Lush Retro at Dutch Mailorder!!!

 As of tomorrow, all the Valentines products will be in stores, and will also be available at the Dutch mailorder.
But the Dutch mailorder has a little surprise, they are going to be selling 3 Retro Lush products. So, if these were your favourite products, or if you haven't seen, smelled or used them before, here's your chance.
 The 3 Retro Products are:

  • Potion Bodylotion
  • Queen of Hearts soap
  • After 8:30 massagebar
Potion bodylotion


 If you love the smell of Ruby Red Slippers, you're certainly going to love this one. Potion lotion smells of roses and tangerines, but mostly of carnations. It moisturizes your skin with a light touch of almond oil and cocoa butter, softening it with rose petal infusion and toning it with fresh tangerine. Take it on holiday as an aftersun, too.
Only available for a limited amount of time, and in a black bottle, for 16,95 euros (250g)


Queen of Hearts


Queen of Hearts is one of the few soaps with which you are allowed to wash your face - because Lush says so. QoH is made with a base of rose petal infusion, so it's gentler on your face than body soaps. It's got cocoa butter to keep your skin flexible, moisturizing almond oil and balancing geranium oil to keep your skin soft; it cleans without drying out your face. Btw, Lushuses their ground breaking palm free soap base in all our soaps.
Only available for a limited amount of time, 7,95 euros (100g ) 


After 8:30


 Real white and dark chocolate make After 8.30 a delight for four of your five senses.  This is a stimulating, mint-chocolate Massage Bar for a quiet night in from the cold. It smells just like those delicious after 8 chocolates!
Only available for a limited amount of time, 7,95 euros a piece

I've got the Blues for you..

Not too long ago I would never have used blue eyeshadow. It wasn't untill I bought some petrol colours and people started telling me those colours looked good on me, that I really started looked at other blue colours.

So today, I'm writing a blog about blue eyeshadow.
What did I use?


  • Metallic Stones Palette
  • Hema eyeshadowbase
  • Gosh Flirty Curl mascara


I started out with the Hema eyeshadowbase. Because this palette already has a great shimmer and great pigmentation, I really didn't need the Gosh eyeshadowbase.
I used the 3 blue colours that are in the zoeva palette below eachtother on the second row from the right:


I started with the lightest colour blue, which has a bit of a silver touch to it, second from the bottom second from the right.
I applied this one in my inner eye corner and a little in the crease. Next to that I applied the colour that's above the previous one. And lastly I used the blue colour that's on top of that row, in the outer eye corner and the crease.


Below my eyes, I used the same colours in the same order as an eyeliner. I applied these with my Zoeva angles eyeliner brush, which i just LOVE. After that I smudged them a little with the Smudger brush by Zoeva. Sometimes I even use this brush to apply a line below my eyes. Gives a great effect. And as a last step I applied some mascara.


Here you can see the great shimmer these eyeshadows have, i really LOVE this palette. :)


And, a full face pic, I only used a little Soft Touch Soft.n shine on my lips, by Gosh.
This is also what my hair looks like after I rode on my bike through a very windy night, with a ponytail. lol


Smith's Rosebud Salve Review

I have really really dry lips. As a child, my jaw wasn't in the right place, so I couldn't breathe with my mouth closed, it took a lot of braces and years and years of them. But now I can close my mouth..doesn't mean that I ever do, lol!. Still, it left me with the habit of sleeping with my mouth open. That and the fact that I used to have a cold 24/7 aswell. Allergypills solved that problem, but I'm drifting off now.
Anyway, sleeping with my mouth open, dries my lips out even more. So I really need a good lipbalm. I have collected several that work for me, but none of them was hydrating enough for the winter.
Especially lately it has been a very cold winter. Normally, I would have cracked lips by now, bleeding sometimes and always very painfull.  Luckely for me, that's not what happened....

At beautyreview.nl I read a lot of reviews about Rosebud Salve and everyone was very excited about it. So I decided to try it out myself, maybe it would help me get through the winter.


Rosebud Salve is a very well known product nowadays, probably because even Oprah has talked about it. Still, before I visited Beautyreview.nl I never heard of it. You can't buy it in stores in the Netherlands as far as I know, but there are a lot of sites online that do have it in stock. I bought mine from someone who sold them at marktplaats.nl, and it cost me 8,95 euros. It's a bit pricey for a lipbalm, but then again, you get a tin that weighes 30 grams. That's a BIG tin. Also, you don't need much, so you can do a long time with one tin. Seeing it that way, aound 10 euros isn't that expensive...as long as it works.

The tin itself is a beautifull thing, it's dark blue with little roses on the side. On the lid there's a lot of text and some roses aswell. It's very oldfashioned looking, which I love. And it's not really a surprise that it looks oldfashioned, because Rosebud Salve was first made in 1892! This packaging has been used since 1962, so this really is a product from the past. Knowing that, this product must be doing what it says, because it has been around for a very long time.
 
It has an orange toned pink colour, which smells a little like roses, but mostly like other lipbalms. It's not really perfumed or anything. It feels soft on my lips and it feels like they heal instantly. That's not really the case, BUT they do heal pretty fast. It tastes a little like roses, which takes a while to get used to, but it's not a bad taste. Now, I'm already used to it, and I kinda like it.
I purchased it a few months ago, and have been using it every since. I only use it during the day, at night I used a different lipbalm. Especially in this winter weather, it is a great balm for my lips. I don't have ANY cracked lips, a lot less skin that I can peel off, and they just feel a lot better. I also feel the difference on the days I'm at home and I forget to use it, because my lips starts to dry out really fast. I always have the tin in my purse, that way I can't forget tot ake it with me when I go outside.
The salve can also be used on dry spot on your skin, which I haven't done much, but it seems to work pretty good when I do.


So to me this really is a wonderfull product. Especially for people who have really dry lips, please try it out, I'm pretty sure you'll love it.

Have any of you ever tried the other rosebud salves? Which one is your favourite?

Scruples Direct Volume Spray Foam Review

Hello! Happy Wednesday! :-) Today I'm reviewing my first Scruples product - Scruples Direct Volume Spray Foam. This product claims it "adds unbelievable body and shine to hair directly where it needs it most. Hair feels thick, manageable and loaded with volume." I actually won this product in a giveaway from http://www.thefashionablegal.com - and so far, I'm liking Scruples! I had never heard of Scruples before I got into cosmetology and started going to pro stores, so it was actually kind of exciting trying a product from a brand that I knew nothing about. On the Scruples scale of 0-3, this product is a 3: Extra Firm. But don't let that scare you - cos while it does have a nice hold, it won't be tornado-proof... if you catch my drift. ;-)

One of the interesting things about this product, is that it literally is spray foam. It's not like a lot of other products that say spray foam, but it's basically mousse with a nozzle - if you try and spray this in your hands, it will immediately dissipate and turn to liquid. In my opinion, this is MUCH easier to use than typical root lifting/volumizing products. I just find them to be messy+ sticky, and it usually gets everywhere in your hair, except for where you want it! This product sprays a fine mist that goes right where you point it - I love it!

Now, on to the ingredients: Water, Hydrofluorocarbon 152a, Acrylates/C1-2 Succinates/Hydroxyacrylates Copolymer, Butane, [lots fluff ingredients], Hydrolyzed Glycosaminoglycans [Mucopolysaccharides]*, Hydrolyzed Wheat Protein*, Benzophenone-4*, PEG/PPG-18/18 Dimethicone*, Aminomethyl Propanol, Polysorbate 20, etc... The * means it's part of the product's "Protective Barrier Complex" AKA marketing gimmick. It's a neat name though.

Most of these scary sounding ingredients are just emulsifiers (Polysorbate 20, PEG/PPG-18/18 Dimethicone) stabilizers (Aminomethyl Propanol), and propellants (Hydrofluorocarbon 152a, Butane). Propellants are ingredients that shoot the product out of the aerosol can, whether it's hairspray, mousse, root lifter, shine spray, etc - they all have them. Acrylates/C1-2 Succinates/Hydroxyacrylates Copolymer is an obscenely long name for a film former. It protects against humidity, and adds volume and hold, along with hydrolyzed wheat protein. Hydrolyzed Glycosaminoglycans [Mucopolysaccharides] are glycosaminoglycans that have been partially turned to water by hydrolysis. Naturally, glycosaminoglycans are very hygroscopic - which is the ability to attract water from the surrounding environment - however, since they've been hydrolyzed, their ability to bind water has been greatly decreased. Basically, in either form, they enhance the texture of products that are water-based. Benzophenone-4 is a UV filter in the mighty Protective Barrier Complex! Basically it's a sunscreen. Did I miss anything? After a while, the words kind of start to blend together. I don't think so though.

Overall, I would strongly recommend my fine-haired readers to give this a shot. Depending on your needs, it may be a bit too much for someone who just wants light volume in their hair. But like I said in my 2009 Favorites post, if you like a firm (not crunchy) hold in your hair + lots of volume - this may be for you!

Btw, I feel the need to tell you - if you're going to use this, don't layer it with other volume enhancing products. They might not mix well. Of course you can use hairspray to set your style once it's dry, but don't put any other volume product in your hair when it's wet. Just a heads up.

Scruples Direct Volume Spray Foam comes in a 250 ml / 8.5 oz can, and retails for around $13. I honestly really like this product, and I definitely will purchase another one when I run out of this can. Thanks again Fashionable Gal! And thank you all for reading and following my blog, it means a lot to me! Take care of your hairrrr! XO

NOTD (Rimmel & Trind) & New Poll

My NOTD is a very bright pink. I've never really been into all the soft colours, especially for my nails. Pink wasn't really my thing either, but I must say, Iv'e already bought a new bottle of this one.


I used this for my NOTD:

  • Trind Nailrepair
  • Rimmel 60 seconds Vinyl Stars nailpolish, no. 626, Be a star
I started  with the Trind nailrepair, since I'm still trying it out. I'm in week 2 now, and I'm still NOT convinced by it. I'll write a blog about it next week, when I've used it for 3 weeks. Maybe my opinion will change, but I don't think so.


After the Trind, I used the Rimmel nailpolish and cleaned the edges with some remover. (I'll post a blog about how I do my nails, one of these days). As you can see, the ''stars'' in the polish give it a great shine.


New Poll

I've also posted a new poll. The result of the last one was that most of you liked OPI best as a nailpolish brand. I've never used it, so I'll try to keep my eyes open for it.
The new post is all about this blog. What do YOU want me to post more?