Archive for April 2010

NOTD: Rimmel Potion

I still have a lot of older polishes by Rimmel, from the time when they still made duochromes, and darkgreens, not just pinks and reds and such.

(this pic soooo doesn't do the polish justice :(  )

This was one of my favourites, and unfortunately, this is probably the last time I could polish my nails with it.
I used this polis for my Queensday NOTD, since it's still an orange and I wasn't into a bright colour when I did my nails.


It's a dark orange colour with bright green shimmers in it.This gives a bit if a duochorme effect, which I totally adore. But ofcourse, I can't seem to catch it on a picture. You can see some shimmers here, but in real life you'll see a green glow on the polish.


And this is with an Essence nail sticker:


BTW, if any of you still has a bottle of this one, or any of the other duochromes by Rimmel (like Zeitgeist, I LOVE that one), and you don't use it, please let me know :)

-------------

Only one day left on the GIVEAWAY! So if you want to enter, do it now!

Rusk Pro Elements Keratin Smoothing Treatment Review+

Hey all! It's time for another review with my favorite beauty blogger Recessionista! If you're new to my blog, we've actually done this before. See our reviews on Sebastian Potion 9, and Joico K-PAK Reconstruct. I love doing stuff like this, it's so much fun! The product I'm doing this time is Rusk Pro Elements Keratin Smoothing Treatment and she's reviewing One 'n Only Brazilian Tech Keratin Smoothing Treatment, which is basically the knock off of this product. And I think it's brazenly obvious that this is a knock off considering the packaging is almost exactly the same...but whatevs! Anyway, check out her review, and YOU decide which one is for you!


This smoothing treatment is "a deep-penetrating treatment formulated with natural keratin, vitamins and proteins to help improve the strength of hair. Formulated for chemically or color-treated hair. Helps protect hair against heat during thermal styling. Keeps hair smooth and shiny." Interesting fact: both bottles say exactly the same thing. Even in the same font. Well anyway, that's mostly a bunch of nice words, but it is actually a great product. It smooths hair without leaving it feeling heavy or dirty. Let's take a look at the ingredients:
Water, Cetyl Alcohol, Cetearyl Alcohol, Stearyl Alcohol, Cyclopentasiloxane, Dimethicone, Behentrimonium Methosulfate, Fragrance, Propylene Glycol, Quaternium-91, Cetrimonium Methosulfate, Panthenol, Hydrolyzed Wheat Protein, Keratin, Hydrolyzed Keratin, Wheat Amino Acids, Hydrolyzed Oat Protein, Shea Butter, Grape Seed Oil, Macadamia Seed Oil, Honey, DMDM Hydantoin, Iodopropynyl Butylcarbamate, Hydroxyisohexyl 3-Cyclohexene Carboxaldehyde, Linalool, Butylphenyl Methylpropional, Hexyl Cinnamal, Citronellol.
And the list de-fluffed:
Cetyl Alcohol, Cetearyl Alcohol, Stearyl Alcohol, Cyclopentasiloxane, Dimethicone, Behentrimonium Methosulfate, Propylene Glycol, Quaternium-91, Cetrimonium Methosulfate, Panthenol, Hydrolyzed Wheat Protein, Keratin, Hydrolyzed Keratin, Hydrolyzed Oat Protein, Honey.
Before I say anything, let me just say I'm in looooove with how this smells. It's a coconut lovers heaven! Plus the scent lasts throughout the day without being obnoxious, I love that! :D

Okay so, basically what we have is some excellent conditioning silicones, emollients, and humectants. I've talked about a lot of these already, so I'll discuss some of the more uncommon ingredients. Behentrimonium Methosulfate is an emulsifier used to combine (emulsify) water and oil. Quaternium-91 is another excellent conditioning agent that softens hair and protects color. Keratin and Hydrolyzed Keratin are hair proteins that act like the same kind of protein found in human hair. There is some debate on whether or not they actually work, but they certainly don't hurt a product. And then there's honey. Not only is honey the only food in the world that doesn't spoil, it also has a myriad of uses - it's used in cooking, skin care, haircare, and more. In haircare, it's a humectant used as a moisturizing and conditioning agent, and as a thickener.

Who would I recommend this to? I think all hair types can benefit from this product, especially if you have a problem with smoothing and frizz control. Also, Recessionista pointed out that if you're having problems finding a leave-in smoothing product, try this! It rinses out of your hair and works just as well as a leave-in product! She also pointed out that the directions are extremely vague: "Apply to clean, damp hair. Massage in thoroughly. Leave in 2 to 3 minutes. Rinse and style." Yeah, THAT'S helpful. Well, if you want my opinion, I'd use this as a deep conditioner maybe every other time you shampoo your hair. You don't want to use it too much because it might over-condition your hair. I'd say when you use it, apply it in place of or after your normal conditioner and leave it in for the full 3 minutes (or more if you'd like). Personally I leave my conditioner in for the remainder of my shower, but that's just me.

Rusk Pro Elements Keratin Smoothing Treatment comes in a 150 g / 5.3 oz bottle and retails for around $16. Again, check out Recessionista's review and compare them for yourself. I'd say we both had similar experiences! How about you? Have you tried either the Rusk or the One 'n Only? Comment and let me know your experience!

Also, don't forget to enter my contest to win a Pink Hana Flat Iron! It's open for three more weeks, so tell all your friends! And take care of your hair everyone!

Queensday!

Today, it's Queensday! It's all about ORANGE today, yeah baby!

I'll be going to watch and maybe buy all the junk and 2nd hand stuff people will be selling today.Lol.  And I'll be eating the wonderfull scottish buns with scottish salmon and homemade musterd-dille sauce, Wullie always makes and sells especially on this day.

I won't be online, but I'll give you this incredibly dorky picture from last year:


La Roche Posay buys

My skin is really dry and I always thought a daycream for dry skin would be enough. But I did a test online, and apparantly I have a dehydrated skin. Which happens a lot to people who don't drink enough. Guilty as charged.
So I decided to try out this brand that was recommended to me: La Roche Posay.


It's a daycream that gives an intense rehydration, and it has an SPF of 15. I always use a daycream with an SPF from april to august orso, because my face, especially my nose, can burn easily. Also, I don't want to get skincancer.
I bought it at the pharmacy for 18,95 euros.


Then I saw this package with samples of other products from the same line. Since I'm looking for an eyecream aswell, I decided to buy the samples, and see how they felt on my skin.


The packages costs 3,50 euros and includes:
-cleanser
-thermal water
-day cream rich(better suited for winter?)
-eyecream
-Toleriane Teint

It also includes a coupon which gives a 3,50 discount on a purchase from the line.
I gave the day cream sample to my sisterinlaw to try out, since I think she has the same dehydration problem as I have.

I'm really interested to try all these out, and I'll write a review later on.

EFF haul


I didn't write a  blog this morning because we had a medical emergency. My husband forgot his medicine and since he doesn't work in Alkmaar, I had to arrange for someone to take me there. After that I went grocery shopping and stuff, so I'm late. Sorry :)


I haven't bought a lot at the EFF, but I will show you anyway, most was bought by my husband, haha.

We both bought a tshirt with a silver print on it. The drawing was made by a Dutch fantasy artist, and could be bought on paper aswell. We liked the tshirts a lot, so we both ended up buying one, each a diff print.
This one is mine:


At the same stand, I bought this drawing from a female artist that was sitting there:

When you bought a drawing, you got a personal sketch for free. Personal as in, they would make it right in front of you. But she personalized mine a bit more, by adding the bird:


 I bought this Necklace by Alchemy, which I'cve adored for years and now finally decided to buy:


Lace 'cuffs' to wear as bracelets, or to pimp up longsleeved shirts or jackets:

We also bought some McFarlanes dragons, tarotdecks(Klimt!), books and dvds. Even the Twilight graphic novel for only 8 euros...hubs wanted to have it...weird huh? :)

And I just have to share this pendant my hubs bought, we both love dragons, and this was such a funny thing to add to the collection:

I had a lot of fun talking to people we met over the years, and meeting new people like Linda.
The weather was awesome aswell, even though it was maybe a bit too hot. I didn't wear my bolero for most of the day.
I'm hoping to get pics by photographers soon, and when I do I'll post them on the blog.


------------

Wow, I wasn't online for a way and the blog went past 50 followers! Yeay!. I'll definately be doing more giveaways. I love doing this and apparently so do you :) Thanx for following!

EOTD: Old Gold


This is a simple look made with the following products:
  • Hema eyeshadowbase
  • Metallic Stones palette
  • Hema eyeliner pen
  • Barry M kohlpencil

I used some golden colours from the MS palette, that had an antique feel to it. I wanted the look to match a selfmade steampunk pendant, and these colours really worked with it.


I used 3 or 4 different shades of gold and blended them al together. Then I applied some eyeliner with a wing. Wings always have a little bump when I photograph them like this, because I have a very deep crease.

Below the eye I applied some kohl pencil and smudge it with a smudgebrush, to give it a softer look.


I'll post pics of the EFF soon, but I'm waiting for some pics made by photographers first.
Also, don't forget about the GIVEAWAY!

Review & Swatches : Barry M, Kohl Pencil

I've always had troubles with applying eyepencil on my waterline. Or better said, with the pencil staying on the waterline. My eyes would start watering and within a few minutes the liner would be below my waterline and/or in my eyes. Needless to say, I never put anything on my waterline.

And then I saw a vid on Youtube where someone really recommended the Barry M kohlpencil for the waterline. Because I wanted to try it for my EFF makeup, I decided to order it and try it out.


The first time I tried this kohlpencil on my waterline, it stayed on for hours. I was really surprised!
Then, yesterday, I wore it all day, and even applied a little bit of black eyeshadow on top to fix it in place a bit more.
My eyes/waterline did not itch, didn not turn red, and no kohl came into my eyes. I didn't even feel I was wearing it and at the end of the day it was still perfect.
Needless to say, this is a great product!

Here is a swatch in daylight:


The pencil is soft enough to use on your waterline and to make a line, but also hard enough so it won't crumble or anything. It's really black on your waterline, not some shade of grey, but dark and black.

I really love all the products I own by Barry M and this is once again a keeper.


This Kohl pencil (Black, no. 1) is available at alicejohavesentials, for only 3,99 euros.

How to: Queensday Nails (koninginnedag nagels) Or World Cup nails

With Queensday coming up,  wanted to show you what you could do with your nails.
ALso, I'm not into soccer myself, but you can also wear this for the World Cup :)


It's really easy to do, and you can do it on all your fingers (like I did for yrs on queensday), or just on one fr that extra touch.
In this tutorial, I only did it on one nail, because I removed the polish after making pics. It's not Queensday yet!

Products used:

And ofcourse the Orange Drops by Gosh, that will be in Stores soon!

The easiest way to do this, is to fold your fingers like you are holding a nailpolish in your hands, and then turn your hand towards you with the nails going down.
Then you start with the blue polish, making a straight line from left to right. Let it dry for a little while before you apply the next colour.
I know it looks messy now, but you can easily remove all the extra polish with a cotton tip later on.

Then you do the same thing with the white polish:

And with the red one:


Then you apply the orange polish to the rest of your nails, or you could do that while you wait for the firstor second colour to dry.

Clean away all the extra polish and this is what you get:


I've always gotten a lot of compliments when I did my nails like this. Are you doing anything special with your nails or makeup for Queensday or the World Cup?


Don't forget about the giveaway!!!

Queensday EOTD (Or World Cup EOTD)


I only used 2 products for this EOTD, so it should be easy to recreate.
First products I used is the 88 palette, shimmer, because a lot of people own one. But you can ofcourse use any palette with yellow/gold/orange/red colours.
Second product is the Gosh extreme art eyeliner , no. 10, but you can use any other eyeliner of eyepencil in blue.
This EOTD also looks great with purple or black eyeliner if you're not into blue.


I applied some yellow/gold on my eyelid and some light orange colours and blended those together. Then I applied some light red in my crease and outer V and blended it to a lighter colour.
I applied some orange colours in my crease and below my eyes to match the eyelid above.


You can use any yellow/orange/red you like really, it doesn't have to be the exact colour I used.

Then I applied some blue eyeliner, to give it something special, and ofcourse blue is in the Dutch flag.
I applied the line from the inner eyecorner all across my eyelid, and into a wing.
Below my eyes, I applied it in a wing aswell, to match the one above.


And this is what my first (I might make more if I have the time) Queensday EOTD looks like:


Are you going to do anything special with your makeup on Queensday?

How to: Marble Nail Art tutorial

Okay, so this is my first attempt -ever- at Marble Nail Art, and even though I FFed up some bits, I still love it.
I didn't do any do-overs because I wanted you to see how they looked at a first attempt, so you could see what I did wrong (or right). That way, it might be easier for you to do it your first time.

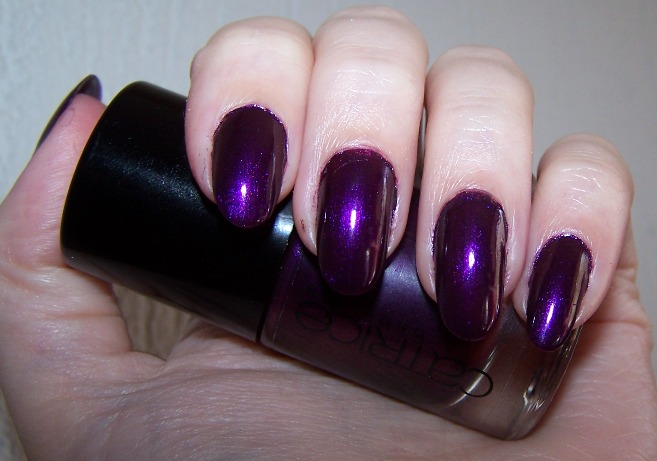
 (yeah that pinky did NOT like a topcoat, oops!)


I really wanted to do a red white and blue one for queensday, but my blues did NOT work with this little trick, so I decided to do a dark green and bright lemon, which didn't work either. *sigh*. So finally I went for 3 colours by Essence that did work. Might be a bit Christmassy(thats a word!), but get over it ;)


Okay, so this is going to be a LONG post, but the pics explain it a lot better, trust me :)

What do you need:
  • a basecoat
  • 2 colours of your choosing(later on you could try more)
  • a plastic cup with water
  • tape(preferably on a dispenser)
  • wooden sticks, you know the ones you use to make sate with, or use on the bbq(see pic off the cleanup)
  • scissors
I used these colours:

I choose the light colour for a base, because its very neutral and if it would seep through, no harm was done.
The other ones I choose because these were the ones that worked, hahaha. So if you want to try this for a first time, you should try this brand. They are cheap and usefull.


After applying the basecoat, it's time to tape your finger. One piece of tape below your nail(across your finger), and one piece of tape that goes along the side, along the back(underneath your nail) of the nail, and along the other side. This is needed, because otherwise your fingers would get really sticky with all the polish. Mine did anyway, because I put my fingers in too deep. I can recommend taping your entire hand before dipping, because tape can get stuck to your nails/polish and it would ruin your marble art.


Then you drop a little polish into the water, just ONE drop.(yeah unfortunately this colour didn't work) And you do this colour after colour(drop the colours inside eachother!), until you get this:


(You get the best result with at least 4 drops of each colour, but that doesn't always work) Then you take the wooden stick and you stick it in the middle and pull it towards the side. You do this as many times as you want. You can then do it the otherway around: pull the sides towards the middle. Like they do with coffee with foam on top, coffee-art? A very simple version is this (I would try more pulls, because the effect is way better):


Then you find a piece of the artwork you like and put your nail exactly there and STAY in the water with your nail. You take the stick again and now twirl this around your finger to take away all the excess polish. (Otherwise It will stick to your nail when you take it out). When everything is gone, you can take out your finger.


Your nail will look something like this:

To remove the tape, you cut it underneath your nail, where it goes around your finger, which will stick out a bit. The polish will dry very quickly and then you can remove any excess polish.
I haven't found a way to get rid of the waterdrops yet, but maybe it was just because I dind't really take my time to do this.

And this is what I had to clean up:


As you can see on my nails, you have to tape them next to your nails, otherwise you can see your basecoat on the side. Also, my nails didn NOT like a topcoat, so beware before you use one, I ruined my pinky with it.
Every nail will look unique, and some will have intenser colours. It gets easier when you go through your nails, that's why my right hand looks better than my left, haha.

My nails after this first attempt:

Left hand

You can definately see which nail I did first, hahaha(ringfinger). I really recommend using as many drops as possible, and as many swirls in the art before you dip in your finger. Be aware of topcoats, mine did NOT go well with the nailart(pinky).


Right hand


I like the right hand, and now I know what to do and what NOT to do. So I can post some better marble nail art soon. But I really have to make time to do this, and most of the time I'm hasty when I do my nails :)

Hopefully, I explained it right, if you have any questions just ask :)

How do you like the effect, and would you try this out yourself?


---

Coming up:
Queensday EOTD and Queensday NOTD, tomorrow and the day after!

NOTD: Poison Me, Poison You

This NOTD was made with Catrice Nail Lacquer: 110 Posion Me, Poison You.

This lacquer is a beautifull dark purple indoors, but in the sunlight the pink shimmer really lights up. It gets even pinker than you can see on the pink, it really becomes a pinkish purple.


The polish comes in a stylish round bottle with a black cap. It reminds me a lot of Gosh, but maybe that's a coincidence.


The polish has a great shine without a topcoat, do you don't really need one.
It gets white lines on the top of my nail, but almost all polishes have that, because of typing and work.
It hasn't chipped in 3 days, it can probabkly hold even longer.
Only thing that I didn't like is the fact that ir run a little underneath my cuticles, but that's just a small annoyance.


Don't forget about the giveaway!!!